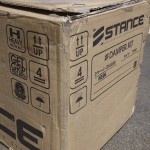
 So whats the status of the AE86 Corolla? I’ve actually been driving it, kidney bouncingly it every day. Here’s the story behind that. Last I mentioned the AE86, I believe it was running and autocrossing. Was having rear end traction issues, so it was in my plan to work on the suspension. Debating piecing together a cut and weld kind of arrangement, but found a complete coilover system just released from Stance. The rear is not really a coilover, but is still adjustable. That was ordered, along with a complete Prothane polyurethane bushing kit. Suspension was taken apart, old bushings removed, cleaned up,
 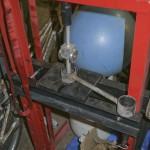 and repainted with POR-15. That POR-15 is tenacious stuff, even taking a torch to a piece we needed to extract a metal bushing from didn’t mess up that paint much. The rickety mystery Chine hydraulic press once again came into use. Got the job done, but it doesn’t instill much confidence! The bushing replacement was pretty straighforward and easy. Only the rear panhard presented some challange as it had metal bushing/sleeve that needed to be extracted, and one side had a wasp waist single piece bushing that required the press, liberal lubrication, and some worrisome looks at how much the bushing was squishing and squirming jamming it into place.
  The front coilver strut assembly fitment and installation was pretty straighforward, except that Stance had the top mount camber plate switched from left to right. In many other strut applications, it wouldn’t matter, but the AE86 has the hub axle as part of the assembly and because of that there is a difference between left and right. Quick fix, but makes for a little head scratching if you don’t realize this and try to install. The other issue with the assembly is there is not a good provision for clamping the brake hose. They provide a metal band clamp with a little loop to hold the funky damper adjuster proboscis. It’s hidden in this picture, what it is is a rubber cased cable that comes out of the bottom of the strut attached to a remote knob to turn the adjuster in the strut. It’s a weird arrangement necessitated by the upside down damper design (you’ll notice how thick the chromed shaft is) having the adjuster at the bottom, and the threaded body of the lower strut to allow for height adjustment without affecting spring preload, but meaning they couldnt put an adjuster knob on the side.
 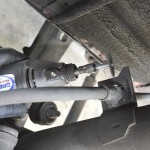 With nothing given to hold the brake hose, what to do? There was the ziptie option, but I was not thrilled with that idea for brake hose. Eventually what we worked out was to use the provided clamp as a base for the brake hose and instead use zipties for the adjuster dongle.
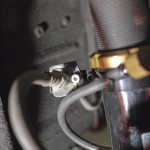 Busted out the Dremel and with cutting wheel cut off the OEM style mounting tab from one of the many parts I had laying about. A bit of drilling, filling and custom modding, we bolted them up to the metal band strap and got a much nicer almost OEM positioned brake hose mount. (You can also see the dongle I was talking about here, with the gold colored knob on it)
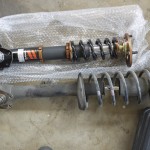
The rear was where things started to get more funky. I went through the trouble of using spring compressors, which I later found out was unneccesary, no big deal. It was all out in short order, impact wrench is your friend! The rear shock was pretty dead.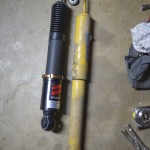 I had to grab the shock and pull on it to extend it out. Here you see the new Stance for comparison. Looks sizeably bigger, and it is, which is where one of the problems starts. The shaft is thicker, which in of itself isn’t a problem. But Stance only provided a correct sized nut for the shaft. The OEM rubber bumpers and dome washer’s holes are sized too small. WTH? The rubber can be forced on, but not the washers. We ended up drilling out the washers and snapping a large bit in the process.
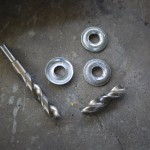 I also later ended up finding some rubber bumpers at Napa, I believe labeled for Ford, that kind of fit. The problems didn’t end there, the lower mounting of the shock is also much thicker, the original bolts are too short. That is easily solved by buying longer bolts, but again Stance should have included these. Next up was the shock top mounting. Aside from thicker, the top of the shaft past the mounting shoulder is a lot longer.
 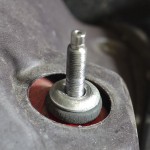 The problem here is the threads stop to early. Solved with a stack of washers. Quick fix, but kinda ghetto. Somewhere along the way, one of the adjuster knob tops also broke off. Ended up not being a major issue, could remove the top cap and use an allen wrench to adjust the damper, just lose the clickys. But the machining of that cap left very little metal and vulnerable to snappage. The rear spring adjuster is actually a design used by number of other companies. It uses a threaded top seat with lockrings for spring preload adjustment. In concept it would be fine, in execution here it was far from ideal. The main issue is the original design has the lower seat designed for the raw coil spring end. It has a cruved seat to match the spring end. The upper seat is flat, designed for a spring end that is machined flat, and is tucked up into the body. The preload adjusters work on flat spring ends, so in this design goes on top. That is the problem. The threaded adjuster sleeve sits up into the well, and with these the diamter was smaller than OEM so does not seat fully up into the original position. And it being inside a well, blocks easy access to the lockrings. When I first installed, I set the lockrings to where I could just barely adjust them with the tools.
 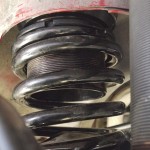 This put it a couple inches in, and when I drove made for a ridiculous ride that was downright dangerous. It rode like it was on bumpstops, bouncing on anything but the smallest lumps. I started to back off the preload and it got better. I eventually backed the adjusters all the way out, and even removed one lockring to get as little preload as possible. But to do this, you need to unbolt the shock and drop the axle all the way down to pull the spring and adjuster out. This defeats the whole idea of the coil adjuster making it easy to make quick adjustments. You might as well use lo-tech spacers, which would end up being lighter. The only advantages is you can make infinitely fine adjustments and you don’t need a stack of different sized spacers. And this wouldn’t be so bad if I didn’t have performance issues with the rear bouncing around. I’ve had rear traction issues coming out of turns from the start, which I thought an upgraded suspension would help, but it has ended up not much better. Initiating turns is way snappier and responsive, but in the turns the rear will get unsettled and start bouncing and then if you try powering out it just gets out of hand.
I’m going to need to call Stance about this. These are early release items, I’ve heard they’ve at least solved the lack of hardware issue, but I’m pretty unsatisfied with the rear. I’m considering dropping this spring setup and going with plain springs.
I was pleasantly susprised that I was able to get recon permit, so the car is all legal.
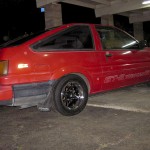 I also chanced accross someone selling some nice 13×7 Starshark knockoffs that I picked up for that oldschool setup. Looks pretty good. This necessitated the old school technique of baseball bat fender rolling to clear the wider tires. Do an internet search and fender rolling and you’ll prob find the import Japanese racer video DIY how to. That’s pretty much how mine went, complete with ghetto painting the paint that flaked off. I don’t think any amount of heat gunning the paint would have worked.
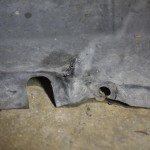 More tips for any other AE86ers planning to go with a drop and wider tires like this, you’ll also need to do something with your fender liners and the joint between the bumper corner plastic. There is a protruding corner at the front of the liner that will rub. What I did was take the heat gun to the liner and reform it to give clearance. Some people cut it. The other rub point will be the lip joint where the bumper corner plastic joins the fender. You’ll have to remove the one bolt there and cut back the lip, there’s no way around that. I haven’t yet decided how to refasten that joint, its loose for now. You’ll notice in a lot of AE86 drifter pics a ziptie right in that corner, that’s what its for. And as long as you have the liner out, here’s something I like to do,
 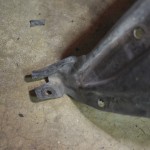 I like to cut out a notch in the rear lower corner of the liner. When you have the liner out, stick your head into the wheel well and look down at the bottom of the rear of the fender toward the door joint. Chances are you’ll see its full of leaves and dirt. There is a drain hole in the fender for that, I like to cut out the liner there to make the drainage beter. Take this opportunity to also go in there and give that spot a good cleaning. All that crud is why fenders rot out from there.
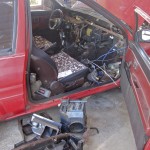 Other issues I’ve tackled in this period is inside the cabin. A few months ago I chanced across a AE86 SR5 coupe in the junkyard so attacked it for whatever interior plastic trim I could find, the heater core, and the window regulators. It is required for my SCCA class to have a heater core, but the AE86 came to me with a bypassed core. The core was still there, but one of the coolant hardlines was smashed and cracked, probably victim of an errant engine swap. I guess it bothered me to have the parts there, but not working, and since the SCCA class rules meant I could not remove it, might as well have a working heater. The junkyard core was actually in excellent shape, just didn’t get around till now to install it. It requires practically taking the entire dash apart. You can see the explosion here, and the heater is not even out yet! What is out is the A/C evaporator. A/C can be removed according to SCCA rules, so I removed the last remaining bits of it here. It would be ideal to remove that big plastic box you see on the ground and replace with the OEM corrugated robot arm duct, but that part is no longer avaiable from Toyota. Maybe eventually I’ll make something.
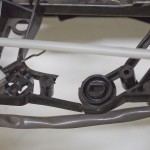 The heater core was swapped no problem.
 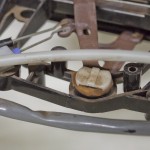 The next problem was the controls for the heater. The lever was seized. The immediate problem was obvious, the frame housing the control cables was broken. What caused this appears to be cables with too much friction due to kinks and age, and the somewhat inadequate amount of plastic frame. I looked at the control module from the junkyard SR5 and it was intact, but also cracking in the same spot. Took some cyanoacrylate to the crack, but I’m sure the problem will reoccur. I lubed up the junkyard cable, which helped, but the resistance was still doubtfull. I noticed there were little posts in the molding of the frame. They were not connected to anything and did not seem to serve any purpose, but they looked perfectly placed to help reenforce the plastic frame.
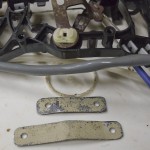 I cut two strips of computer case sheet metal, drilled and slightly formed them, scrounged a bunch of screws, and screwed them into those posts.
 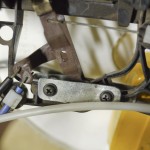 Fits nicely, and it works, although it looks like the stress is now transfered to another area of the frame.
 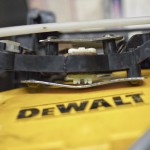 I have a new cable on order with Toyota (amazingly still available) and will change that out and hopefully this will last.
On order is a KAAZ 1.5 way “Super-Q” LSD. Should be interesting to see what that does for my traction issues. I have to wait though, KAAZ USA didn’t have any in supply, guess they need to get all the parts together for my early year “zenki”, the cam parts for 1.5 way instead of the more hardcore 2 way, and in their new “Super-Q” treatment. It’s a new thing that is supposed to make the LSD quieter, longer lasting, and not requiring break in period. I’ve heard that it is basically bead blasting the clutch plates. Anyway, should be fun!
0 Responses to “Auto Progress – AE86”