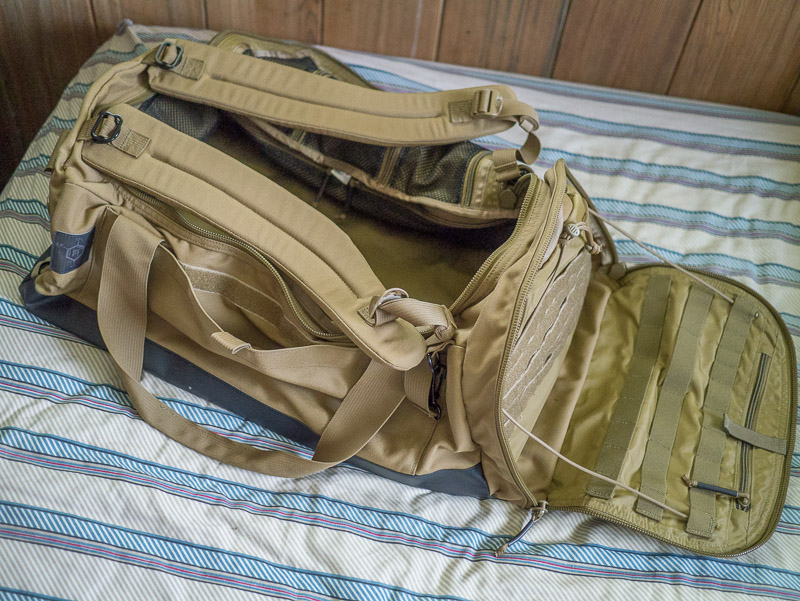
 The big ticket item I ordered from SKD was this, from Refactor Tactical they call it the ASO bag, Advanced Special Operations bag. It’s kind of a glorified duffel, but a very well made tactical duffel. Main compartment has a large opening flap and is devoid of anything else leaving maximum space to stuff krap in. Continue reading ‘Tactical Anvil Shaped Object?’
Archive for the 'Gear' Category
Page 2 of 11
OK, SKD wrangled me with their Ninja school promo discount and a bought a couple things. One is this bag from Hawkepaks they call the recon rifle bag. No, it’s not a tactical man purse, it’s going to be my tool bag for work!
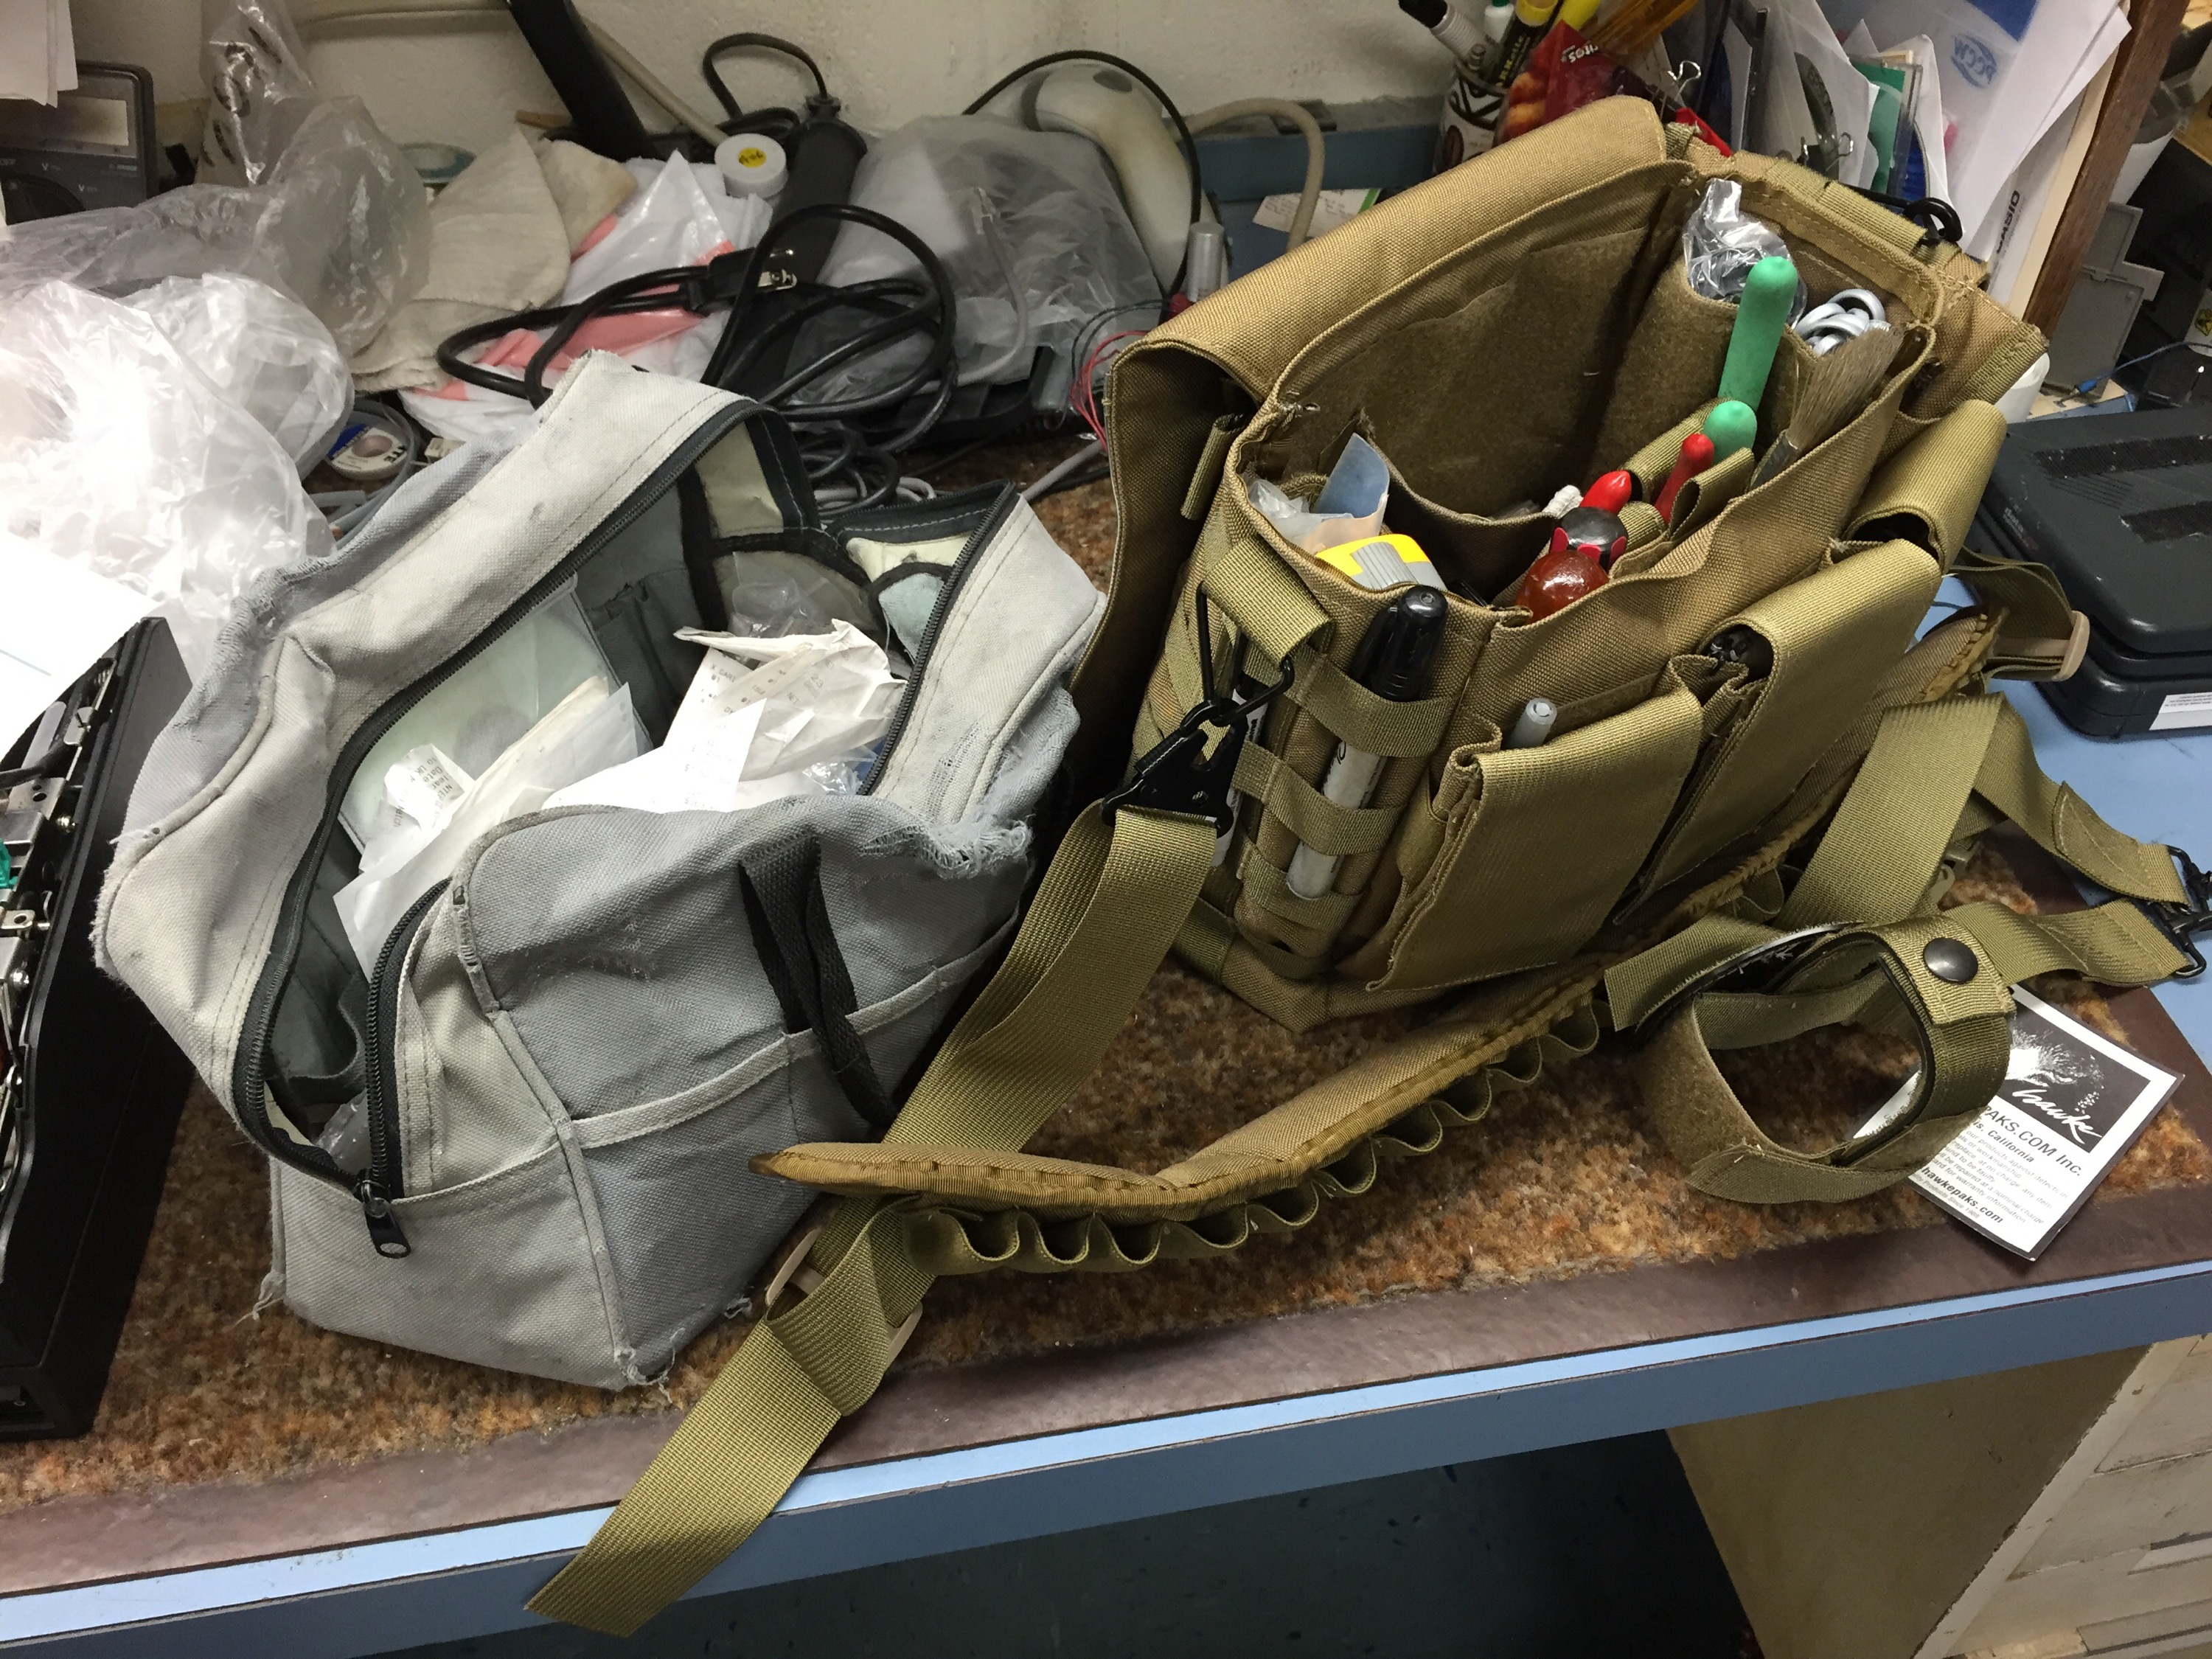
The gray bag on the left is what I’ve been using. It’s a $5 NAPA bargain bin special, but I like it because it has tool pockets that my tools kind of fit into. It’s a touch too small sometimes and the cheap fabric is falling apart, but at $5 I just buy another, this is my second.
So now I have this new made in USA bag. It’s clearly made of more robust Cordura and features more compartments and a nicely padded shoulder strap. It also came with additional MOLLE pouches, one for water bottle and other three magazine pouch to attach as desired, and a holster doodad. Looks like I can make use of all of the parts except for the waist strap. I think that’s going to become spare parts.
So the question is, is this new pack worth 16 times more than the bag I was using? We shall see.
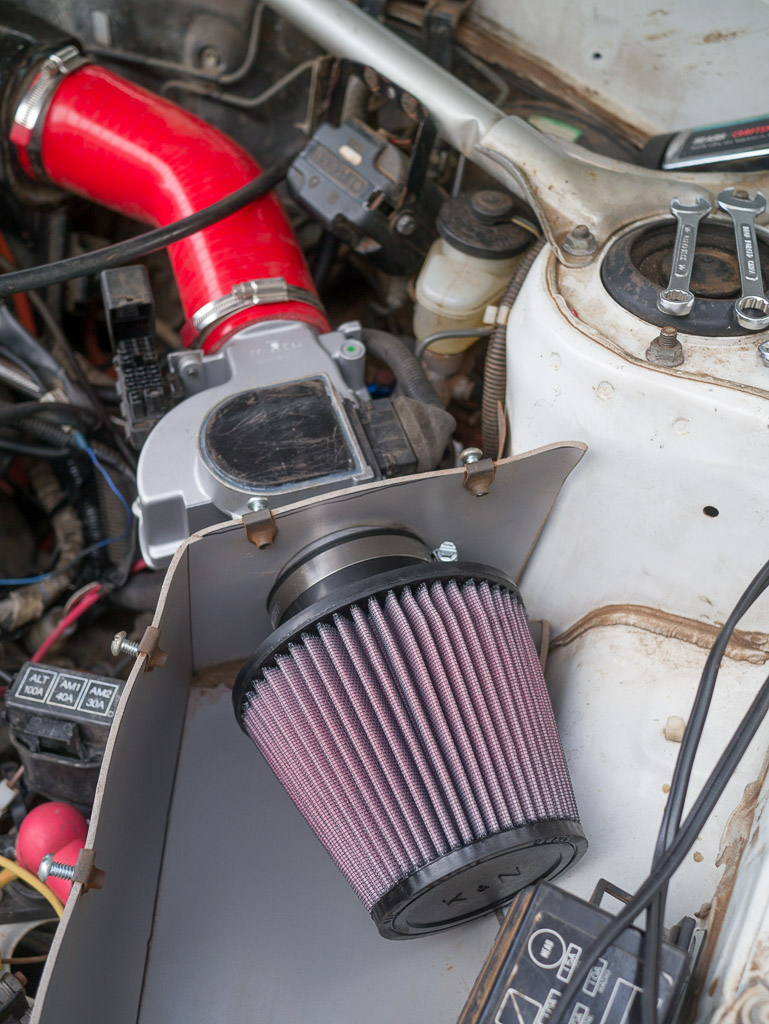 I still have yet to confirm that the engine failure was caused by ingested dirt that scored the cylinders and rings, but that is my current suspect. When I took off the mystery filter, I saw the intake hose had a decent coat of fine dust, and when I blew compressed air through it, just as large a cloud of dust came out the inside as through to the outside.
 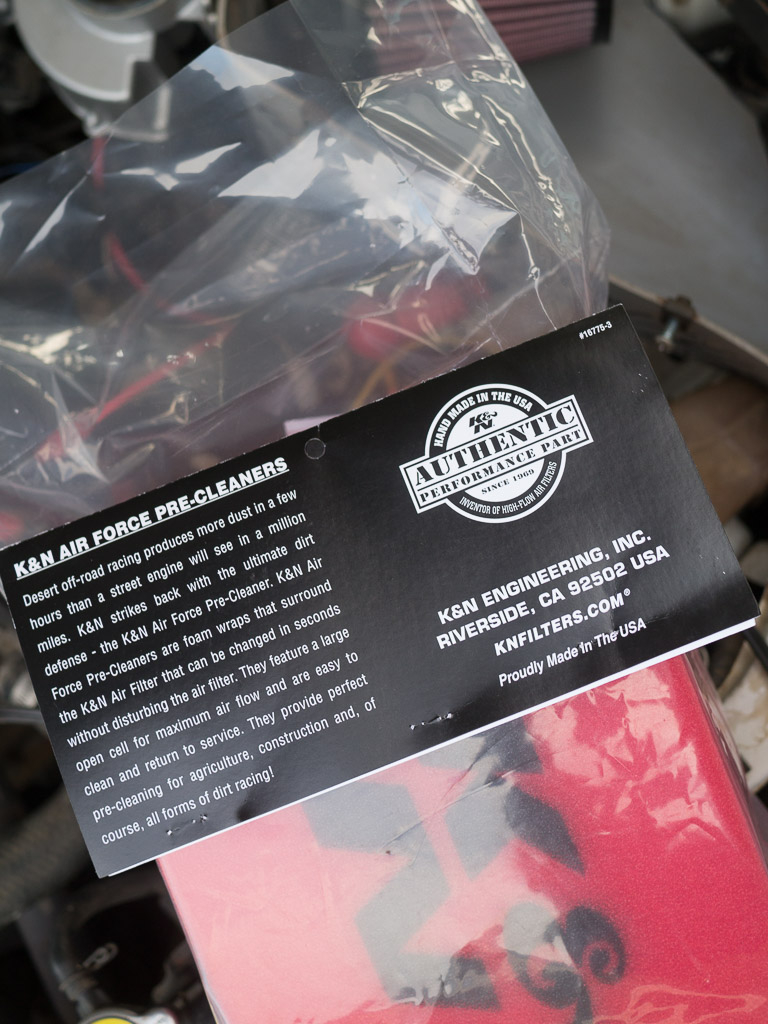 In light of that, I ordered a K&N cone filter from Amazon. Amazon really does sell everything. While I was searching K&N’s website for the appropriate part #, I found this, what they call the Air Force Pre-cleaner. It’s a filter for your filter. It’s reticulated foam impregnated with their oil, “perfect pre-cleaning for agriculture. construction and, of course, all forms of dirt racing!” They didn’t have a preshaped one to fit mine, so I got the generic wrap your own and hold closed with Velcro strips one. As a bonus, there’s enough in the one package for two. Continue reading ‘K&N Filter Filter’
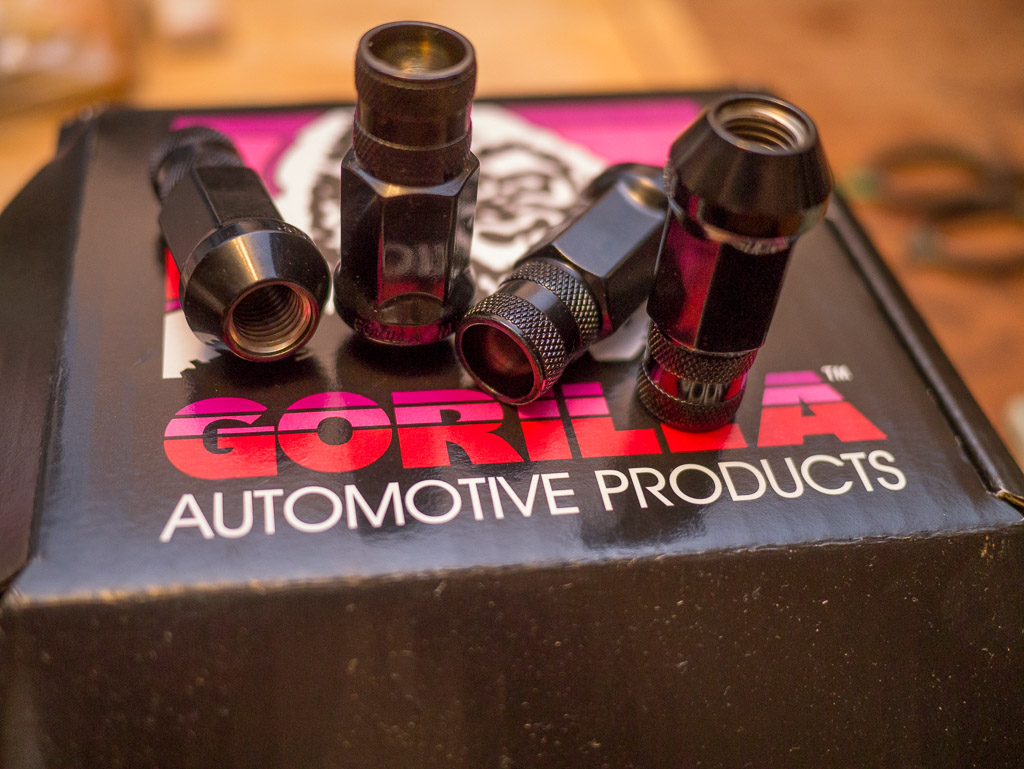 Was busy with the major work on the car, but finally got around to some of the other little things I got for it. There’s these new lug nuts. Main thing I was looking for was nice lugs in 3/4″-19mm socket size that matches my lock lug key. Found these from Gorilla. They look like those pimp tuner lugs, but they’re not quite. Most of those pretty colored ones are aluminum. I was not confident in the use of that for rallycross. We’ve seen bent and torn steel rims, pulled out studs. These are advertised as forged steel. So these with the extended length ARP studs should be plenty strong. The extended length nuts with the knurled end make installing them quite convenient too.
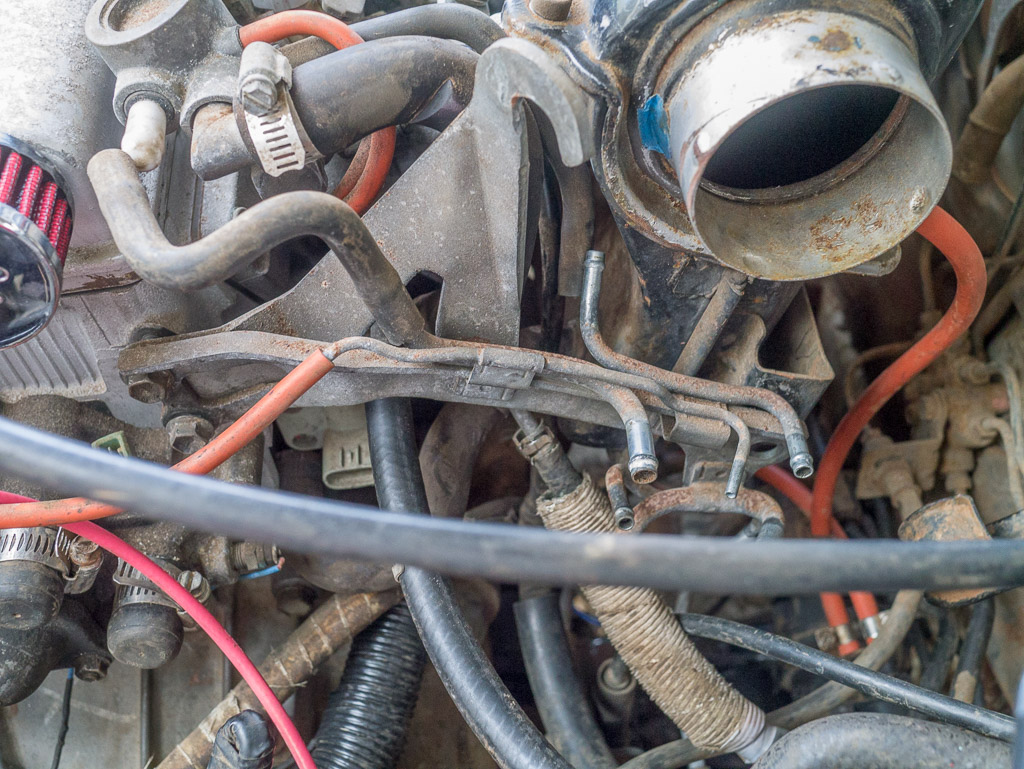 With the engine physically in place I now needed to go about hooking everything up. Unfortunately all the mods that were done to the FX that this came out of were hack jobs. The short shift cut shift shaft held together with hose clamps, the Momo steering wheel spaced with lamp tubing. The wiring harness was pretty hacked that I’d already fixed a while back. What I’m addressing this time is the fuel supplu line. What had been done was they crammed in the stock 16V line in and bent it. You can’t really see it in this mess of lines, but it was not very clean and it bothered me that it did not seem all that safely routed being in contact with all kinds of parts. Continue reading ‘Pimp My Ride’
Ok, if you need to drill holes in ceramic tile, don’t mess around and just get the diamond tipped drill bits. Don’t even bother with a masonary bit. The carbide tipped arrowhead bits work, eventually, but how much is your time worth?
I had to drill four 5/16″ holes for a work installation. Started with masonary bits because we had them. Hours and dulled bits later, one hole not even a quarter of the way through.
Next day returned with carbide tip bit. Almost an hour later one hole finally through. The bit was still pretty sharp, but this was taking too long. Not to mention there was nothing solid behind the hole to screw into so I was going to have to drill again!
Finally, after searching around I found the diamond tipped bit. The 5/16″ came in a “kit” for feeding water. Basically a dribble cup. Neat idea, but I think everyone tries it once then throws it away. Anyway, less than 10 minutes later, the hole is through.
Now I know….
 Been working out various things for action camera filming and one was improving on the pole. Started with one of those ultra compact telescoping chrome steel poles. It worked as a pole, but the only thing it really had going for it was that it collapsed down small enough to stuff into a cargo pocket for the lift ride up. Being steel it wasn’t particularly light for its size, but worse yet was it relied on friction fit to hold the segments which makes it wiggly.
I then got a pair of Leki carbon hiking poles and adapted it to mount a camera to its tip. The pole is very light. It’s great as hiking poles. However it had some issues for use an action camera pole. It has a 1/4×20 camera mount adapter, but that was quickly abandoned as it is too flimsy for action use. I then created a Frankenstein adapter for the tip, which I think I’ve blogged about in the past. That worked. The collapsed size is a bit long, too long to fit inside my riding backpack, not a major issue. The biggest issue was that it used twist lock to hold the segments. This was a problem in that using it with a camera mounted to the end, the segments would unscrew allowing the camera to flop around. You could try and screw the lock really tight, but it would present a challenge of aligning the camera the way I wanted consistently, and when I wanted to collapse it to stow for transport or lift ride it was a pain.
 I guess the usage of “extreme” has not died yet as NW insists on using it for their top of the line cycling shoes. I got a pair of these MTB older models on closeout for a great price. Non-clown/superhero color of black. They feature a carbon sole and a top ratchet strap and lower “winch” lace system. It’s not BOA, which I find interesting since they use actual BOA brand closures on a coupe of their other shoes. I’m hoping this will give me a more secure fit that the Velcro strap closures on my current Scotts can’t.
Wednesday, 25 June 2014
Weather was good enough to get out and try the new Dragon 3’s. I mounted the cleats the day before, and they seemed to snap in at about the right alignment. They were way stiffer than the old Dragon 2’s, but that’s both from the carbon plate in the new shoes, and the old shoes being totally flexed out. There was some discomfort on the lateral edges of my feet at the proximal end of the metatarsals as expected from new, narrow Italian shoes. I figure the shiny, more impermeable Lorica in these new shoes will take longer to soften and stretch, so the break-in might take a while. Wonder if it is the shoes breaking into my feet or the other way around?
D = 8.98 km, Vavr = 15 km/h, Vmax = 32.9 km/h, T = 36-minutes, A/D = 145 m
 The bike rack for the FR-S is finally done. What I did was buy some 1 1/4″ stainless steel rod from a local metal supply shop and then drew up some plans and handed it over to Fabio. From there it went to the mystery machinist. After making a large pile of shiny sharp metal curlicues I got two beautifully machined clubs. The tips were made to match the OEM tow loop and I threaded them in. Shoulders machined at the other end match the clamping areas of the Yakima rack. Put it together and here it is. Used it a few times already and it sure is convenient!