I’m going to catch up on past work I’ve done to the FX so I have documentation of what was done when. Between the time I started working on this post and now, the point has almost become moot, but it’s interesting to remember the history.
October 2006
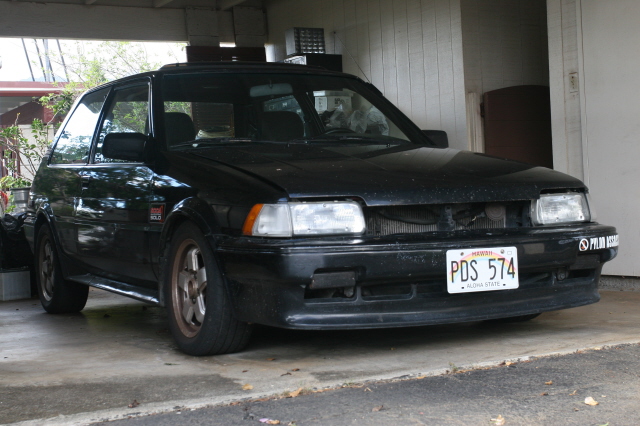
Took delivery of the new FX and picked it up from Pasha Hawaii. Minor adventure. Needed a jump start, clutch was tricky, steering felt wierd, mother is loud. Drive carefully home, feel very self conscious as there are no plates. I stop at the satelite city hall in Hawaii Kai to take care of reg, then take it straight home.
10-13-2006
 Will need to address issues for safety check ASAP. So first thing is to find out what’s going on with the steering. Jeezus! It looks like the steering is held together with electrical tape! Well, it’s not that bad, barely. Lacking the correct adapter for the Momo wheel, it looks like long hex head bolts with threaded tube as spacer. I think Dave identified the tubes as what is used on lamp fixtures.

 There’s a number of problems with this. The wheel flange is countersunk for allen bolts. The hex head bolts trying to sit in these countersinks don’t work. It’s impossible to get them tight. The long spindly spacers on each bolt can’t help but rack so make it feel wobbly and full of play.
Fortunately the original FX has a correct Momo adapter so I take the new FX wheel, which still has an intact non-mummified cover in good condition and put the adapter on. Much better.
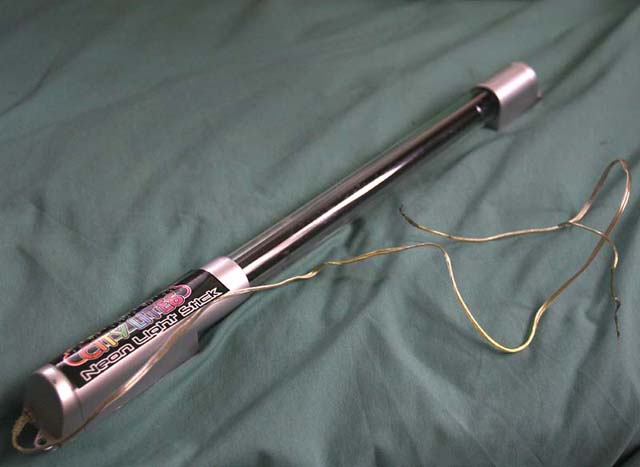
And as a little footnote of insult, I discover a “neon” tube hiding under the dash.
10-14-2006
Small issues with lights, horn, wiper temporarily taken care of so can get safety check. Bring it home, I’m all legal now. And just in time for SCCA Solo II tomorrow!
10-15-2006
Oh yes, this is the day of Hawaii earthquake and infamous Oahu power outage. It’s the strongest I’ve ever experienced. Had me at the front door ready to split at a moments notice. After another aftershock, things seem to have settled down, but the power has gone out. I debate what to do, but I know the SCCA bunch are pretty hardy and hardcore so I head out. A rain starts that develops into a torrential downpour. It so bad visibility is seriously compromised and there’s lots of water on road. I pull under cover at Kahala Mall as I’m afraid of ingesting water into intake which is routed into fender which has no liner. You can be sure I’m fixing that ASAP. I try calling Troy to see if SCCA was still on. Things are looking doubtful with the torrent, the lack of power even in Kahala, and the lack of cell phone connection. The rain lets up and stops, I decide to chance it & continue to SCCA. What else am I going to do with no electricity, which turns out to be islandwide?
As you can see, my results were pretty dismal. The drop springs in this thing are just way too soft. I’m banging the suspension on practically every turn.
10-21-2006
After a week of bottoming on every pothole and scraping speedbumps, I’m pretty tired of it. These springs have got to go.
So here it is pulled into the garage. Okay, I don’t think I’m hallucinating. The angle of picture is kinda off & accentuates it, but it sure looks like its sitting crooked. I love the ease of working on this car. It’s not long before the struts are out.  Here are the fronts for side by side comparison. The difference is obvious. I don’t know for sure, but I’m fairly certain the left one from the original FX16 is a TRD spring, and the right gay purple one is stamped Intrax. In this relaxed state the TRD is actually shorter, but once weight is put on, those thin wimpy Intrax ones sag much lower. Gives a cushy soft ride, until BAM you smack a pothole! Struts all around swaped, stiff performance ride now.
10-24-2006
 Clunking issues. As expected, engine mounts are bad, changed out.
11-10-2006
Clutch has been pretty fussy. Engagement rough. Was told there was supposed to be a performance clutch, so I chocked it up to that. But decided to drop the tranny and take a look. There is a performance clutch of some type, but the real problem is that it’s worn down past the rivets.  Replaced with a stock spec clutch and swaped to my rebuilt original FX16 tranny. Oh, look out, when it’s stamped This Side To Flywheel, install with that side toward the flywheel. Makes sense huh? For some dyslexic reason I installed the wrong way. I clearly remember seeing the words, but for some reason they didn’t register correctly. So I spent a good time wondering why the heck clutch wasn’t working, repeatedly bleeding the hydraulics, checking the fork, swaping cylinders. I finally dropped the tranny. Oh, BTW, drain your tranny fluid. I have the style of CV shafts where you unbolt the shafts from a flange that remains in the transaxle, so I thought I could drop the tranny with those flanges still in and leave the fluid. The flanges interfere in dropping, so I pulled it out, forgetting about the fluid and making my own little Exxon Valdez on our garage floor. Well, at least I can say this was all educational, and I’ve gotten a pretty proficient system of dropping & installing transaxle by myself. I’ll try and document it next time, which should be soon since I’m getting a BT (Black Top) flywheel. Clutch is smooth, if super soft now, and engages late. I’ll survive.
Somewhere around this time I change out the shift lever assembly. There’s been a “custom” short shifter mod done to this new FX, which consists of the stock shift shaft being cut, then overlapped and held together with two stainless hose clamps. I swap over the original FXs adapted short shift assembly. Sorry, no pics right now, but not pretty.
11-28/29-2006
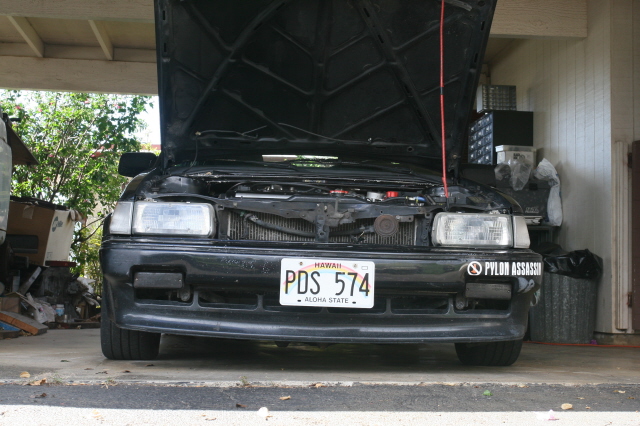
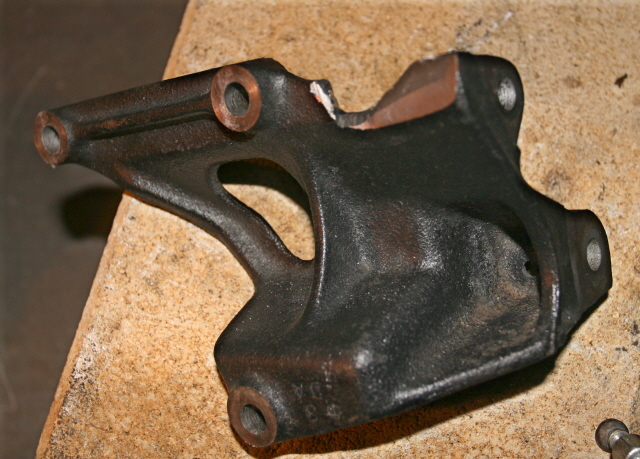
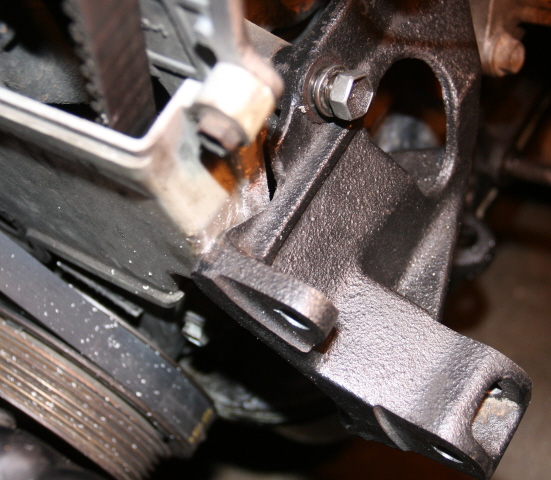
The next hack I address is the steering. The power steering has been removed through removal of the pump. It’s a bear and I want p/s back, esp since this “conversion” was merely removing the pump and leaving the hoses open to air. When you do this, you’re at least suppose to run the in & out hydraulic lines to each other to keep fluid in & dirt out. This leaves the condition of the rack in doubt, and one of the boots is torn anyway, so I set about swaping the steering system over from the original FX.  Now this new FX16 has an engine swap to a JDM 20v 4AGE. This is a 20 valve high compression version of original engine. Most things are the same, but because of the different valve system the head and castings are a little different. I buy a 20v p/s bracket off of ebay. I’m hoping the 16v pump will fit it, but no such luck. As you can see theres a difference in the pump mounting. The engine block bolt holes are the same, so using my trusty angle grinder I customize the 16v bracket to fit.

12-02-2006

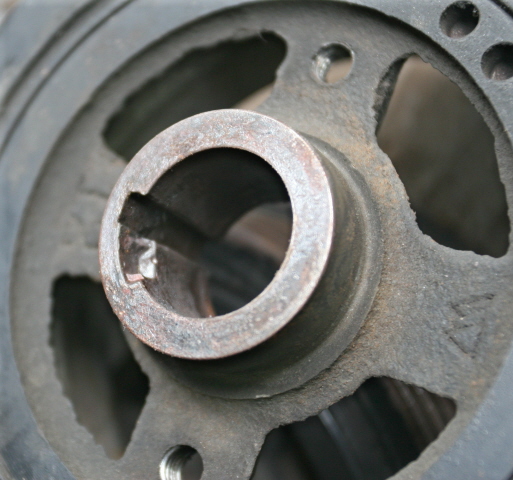
 Now there’s another problem with installing this pump, the pulleys won’t line up with the 20v crank. There’s also a difference in diameter although I’m not sure how much a problem that would be. And in removing the crank pulley, discovered another problem with the 20v pulley. Looks like sometime in previous work someone tried to force the pulley on without aligning the woodruf key correctly. Squish!
Pulleys swapped. I had gone to ABC Used Auto Parts junkyard looking for idler assembly so I could run P/S without the A/C, but all the other Toyota’s are set up differently. A while back I was told the original FX A/C still had pressure in system so I was keeping it trying to keep it intact. I hooked up my pressure guages gotten from my Wacky’s days DRMO deal, and it registered no pressure. Hmm, was something wrong with gauges. I chanced manually depressing on of the valves. Lo and behold, nothing. Ah well, the system is no good, so I yank the compressor out and install it into the new FX to act as a huge heavy idler pulley. So now the rack, pressure lines, pump are all swaped over and hooked up, and it works! Nice! Trip to alignment
Somewhere in this time period I install stainless steel braid brake hoses I bought off ebay. Yet another little adventure as the installation was simple, but I wasted unknown time & frustration trying to figure out why the hell it wouldn’t bleed no matter if I used the vacuum bleeder or old faithful manual method. It turns out that one banjo fitting is not a fitting. Basically its a fancy washer with a hose stuck to it. There is no hole drilled where the fluid is supposed to be able to run from the collar to the attached hose. Swine!
02-17-2007

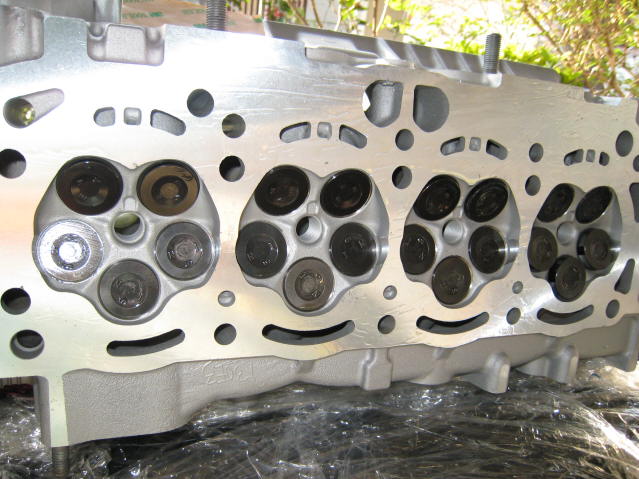
 I buy a used 20v head locally. The engine’s been eating oil & smoking, compression seems to test ok so I figure a valve job might take care of it. Plan is to take this head to be rebuilt, then swap it. 20 valves on four cylinders makes 5 per, the intake gets the extra. Can see them here. Guy I buy this off is a cool local dude, he’s ran it through some cleaner already.
  Pretty clean. I ordered in Toyota 20V gasket set and take the head into Synder Machine Works for a check & valve job. I figured as long as I was going through the trouble, best to go for the good stuff and use ARP studs. Unfortunately the 20V is a Japan engine so ARP has no application listing. Subsequent weeks are taken going back and forth trying to determine the correct size for this head. I had seen elsewhere mention of the possible size to use on the Net, but nothing definite.
03-04-2007

 I have the head back, exactly on time that Snyders said it would be done. Nice job, sparkling clean, nicely faced. You can take a look at how the valves are arranged. It’s said that the five valves per cylinder is more efficient, but it seems it’s not used much. It was used in the Japan 4AGE engines for about 8 years. Audi and Ferrari dabbled with it. It seems one point is the cost to benefit is not good enough, esp for road going production cars.
03-07-2007
 The old head comes off in preparation for the new head.
Somewhere around this time, a determination was finally made with ARP and I ordered the parts through a third party as ARP doesn’t sell direct. So it turns out that the 10mmx1.25 by 5.000 inches long studs fit, nuts part #300-8363, washers part #200-8689. I put a rush on the order and paid for 1 day shipping so expected it to be here before the weekend. I’m trying to get this together in time for the SCCA season end run-off event. Unfortunately through some administrative delays, the shipment doesn’t make it and I have no fastners. They arrive after the weekend, and to my chagrin I find they’ve shipped the ten pack of nuts, ten pack of washers, and a single stud. So now I have to play phone tag again and ask them where the hell’s my studs? The upshot of this is is that the car is not ready for the run-offs.
03-30-2007

 So now I have the complete set of parts for the head studs and to reassemble the head. The studs and gasket are on and ready for installation.

 The newly rebuilt head is now installed, the studs fit perfectly.
And so now were caught up with the past history of this FX, which has now been sitting in my garage for the past weeks waiting on the insurance verdict.
0 Responses to “Past FX Work”